We had about a month’s wait from when we signed the paperwork for our camper at a Camper Expo until we actually got to pick it up and bring it home. I’d be lying if I said I didn’t start shopping for accessories until we actually had the keys. I couldn’t help it. I was all over Pinterest scanning for the necessities we would need from sewer hoses to wall hangings – you know, the important stuff!
Rather than wasting time aimlessly searching, we compiled a list of the first items we bought off Amazon for our camper. Hopefully, you can use this list to get some of the essentials you will need too. With a Amazon Prime Membership, you can save money and get the essentials delivered wherever you are within a few days. Click here to get yours today.
I’ll point out that these are the first things we bought and all things we still have (and use regularly) in our camper. Not things we bought and have since returned or given away. We hope you will find these items helpful for making purchases for your RV. Let us know in the comments!

The First Things We Bought From Amazon (not in any particular order)
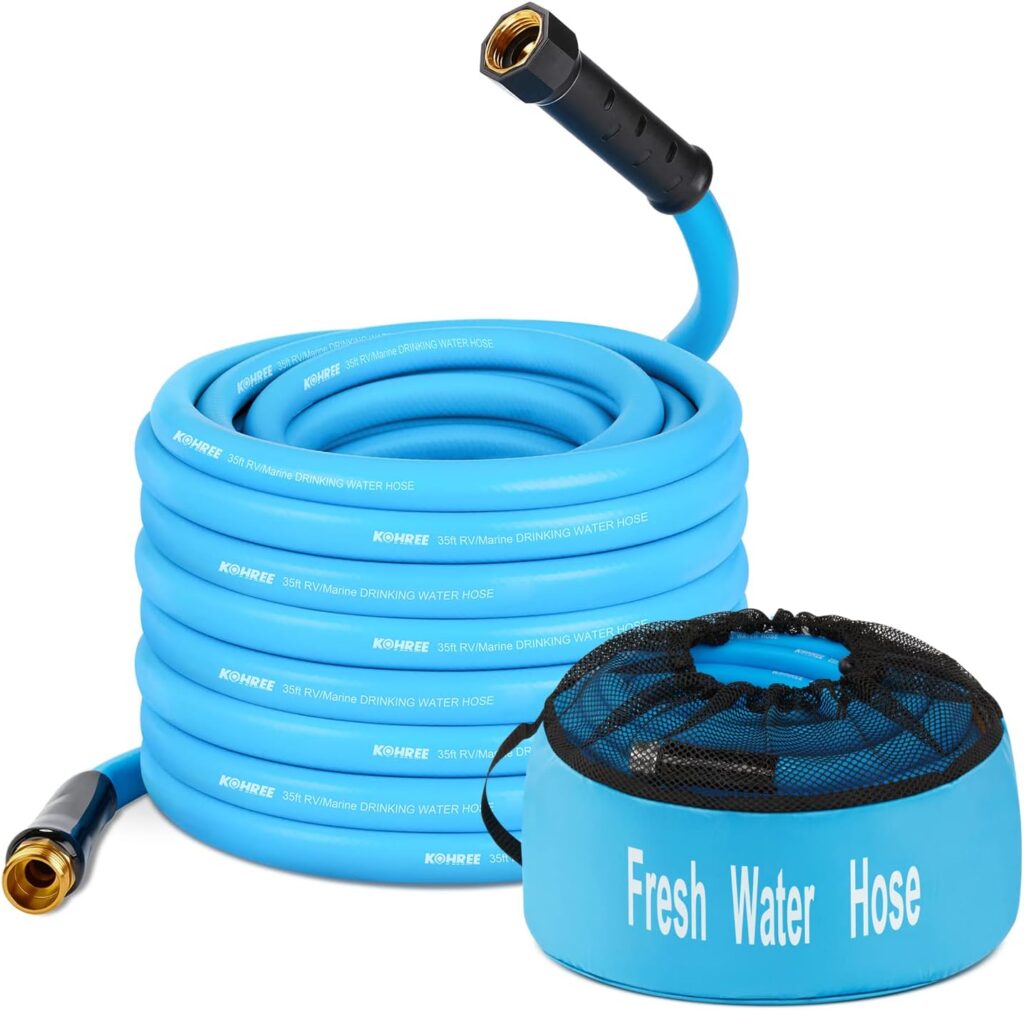
1. Whether you are camping in your backyard or at a campground you are going to want fresh water. It feeds all of your water to the camper: the sinks, shower, and toilet. You aren’t using the same hose to bring water to the camper and what takes water out of the camper. This one is just for the freshwater that supplies the camper.
You can use a regular garden hose, however, if you’ve used one at home, you know kinks and leaks often develop in these. We were told when we went to pick up the camper to buy a blue hose. We found this one and it has worked great for us so far. This hose is designed to be rolled up and stowed in your camper in the bag that it comes with. We’ve had no problems getting the hose back into this bag. It is made with soft rubber that allows it to be rolled up without kinks and tucked away without compromising the integrity of the hose.
This one is 35 feet long which has been more than enough for us at each campsite we’ve been at so far. The whole black piece is a handle so you can spin the whole thing to screw it in rather than just trying to turn the connection at the very end.
Here is the one we purchased: Kohree 35FT RV Water Hose with Storage Bag, 5/8” Upgraded Drinking Water Hose Leak Free, No Kink and Flexible Garden Hose for RV, Camper, Truck, Car – Blue
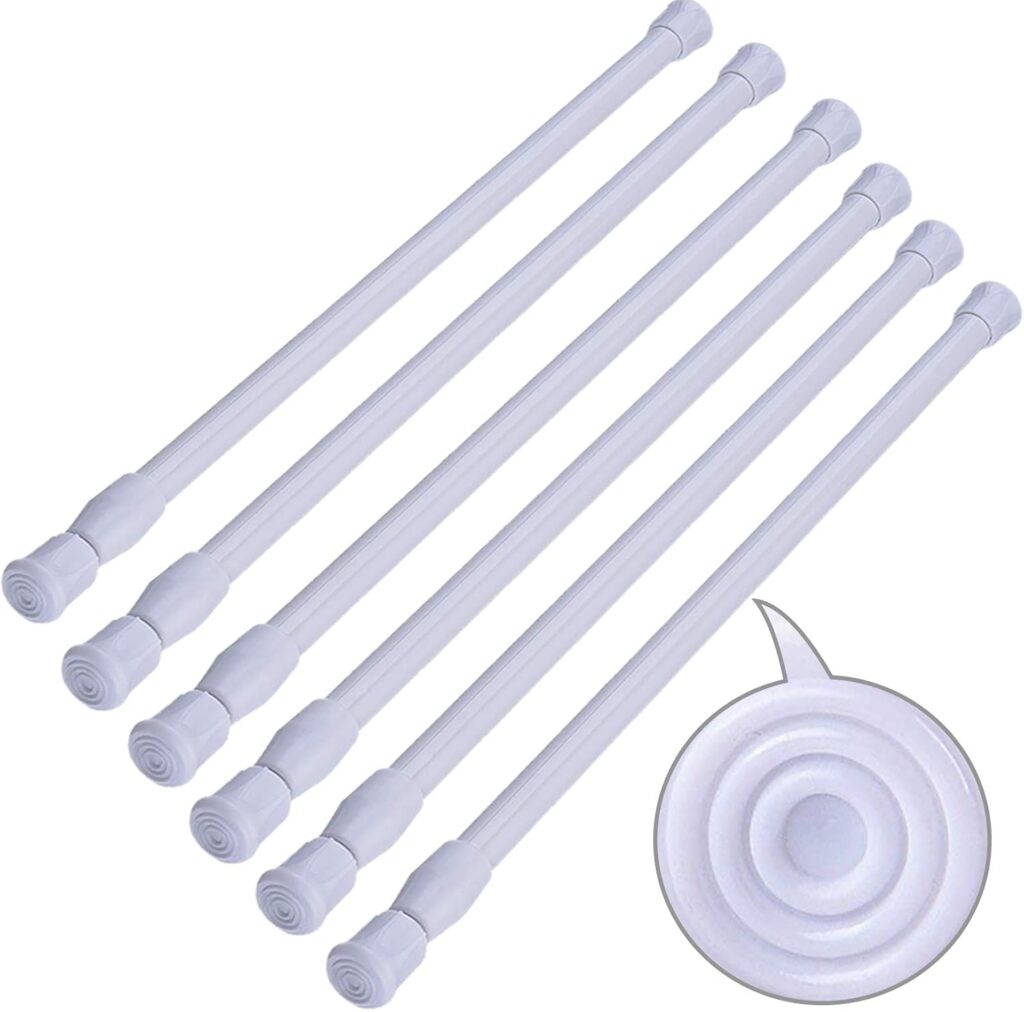
2. Tension rods are useful for putting inside your cupboards to keep everything in place when you are traveling down the road. Friends told us this as soon as we got our RV. We have yet to have any cupboards open up when in travel, probably because of these being in place. We have since learned that you can also put a few of these in a line in your cupboards and create a shelf. We didn’t have a logical place to hold our packages of toilet paper and paper towels. Yet our cupboards were tall and had a lot of wasted space up top. We put four of these tension rods evenly about a foot down from the top of the cupboard. It makes a nice shelf to store more items on. It made a great shelf for this and we didn’t have to screw anything into the camper walls.
Here are the ones we bought: SIQUK 6 Pack Cupboard Bars Adjustable Spring Tension Rods White Refrigerator Bar Extendable Rod for DIY Projects, 12 to 20 Inches
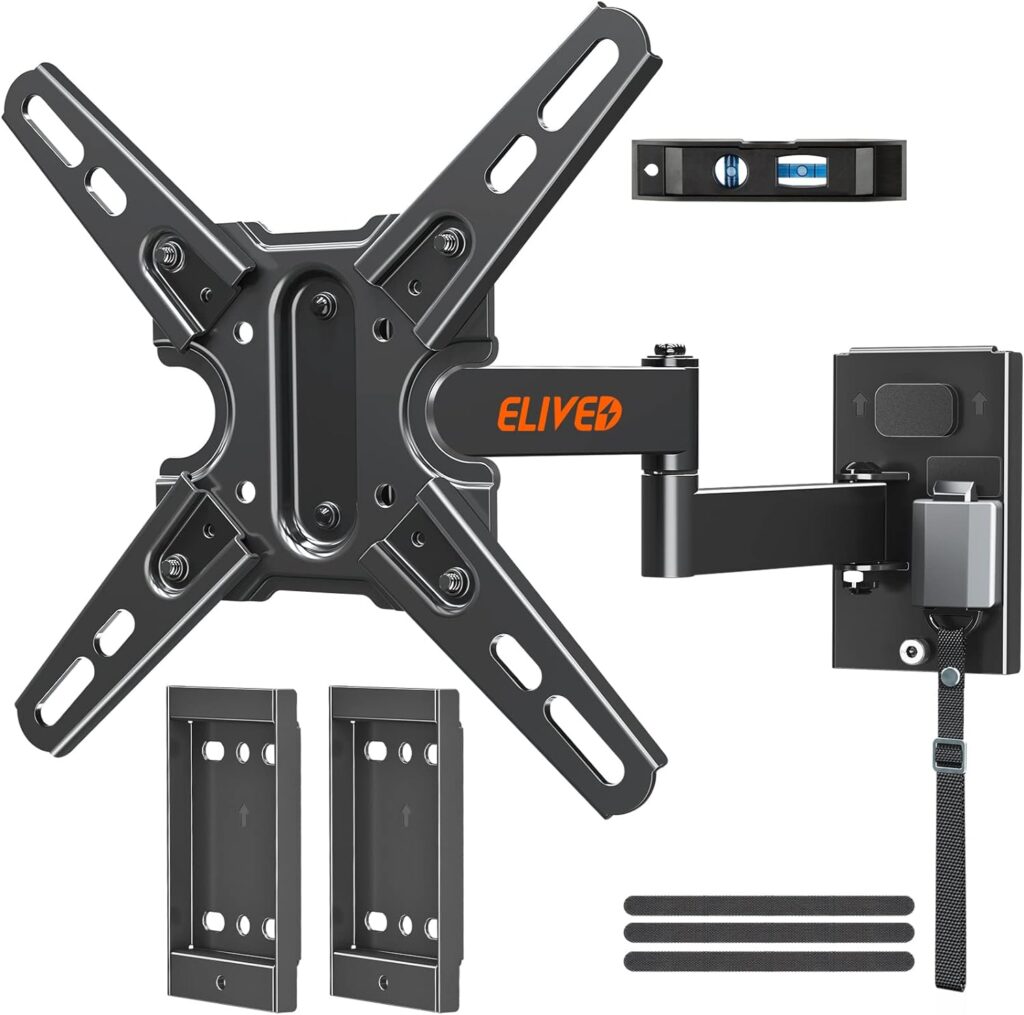
3. Our camper came with a TV already mounted in the kitchen area. While we were able to swivel it enough to see it in our bedroom, we had to turn the volume up quite a bit to hear it from there. Our bedroom wall was already prepped for a mount as well as for power and cable. It was marked by a red sticker indicating that a metal plate was already installed in the way to hold the mounting screws of the TV mount. There just wasn’t a TV. We bought a small 24-inch TV from Walmart to hang there as well as a mount from there. After purchase of their mount though, we realized it was too heavy-duty for our camper wall and we didn’t want to do any damage.
We found this one instead on Amazon that is designed for RV walls because it’s lightweight. What’s also important is that it locks in place for travel so your TV isn’t swinging around on the road. It has worked perfectly for us.
Here is the one we bought: ELIVED Lockable RV TV Mount for Most 13-43 Inch TVs, RV TV Wall Mount Swivel and Tilt for Camper Trailer MotorHome, Detachable TV bracket with double Wall Plates, Max VESA 200x200mm, up to 22LBS
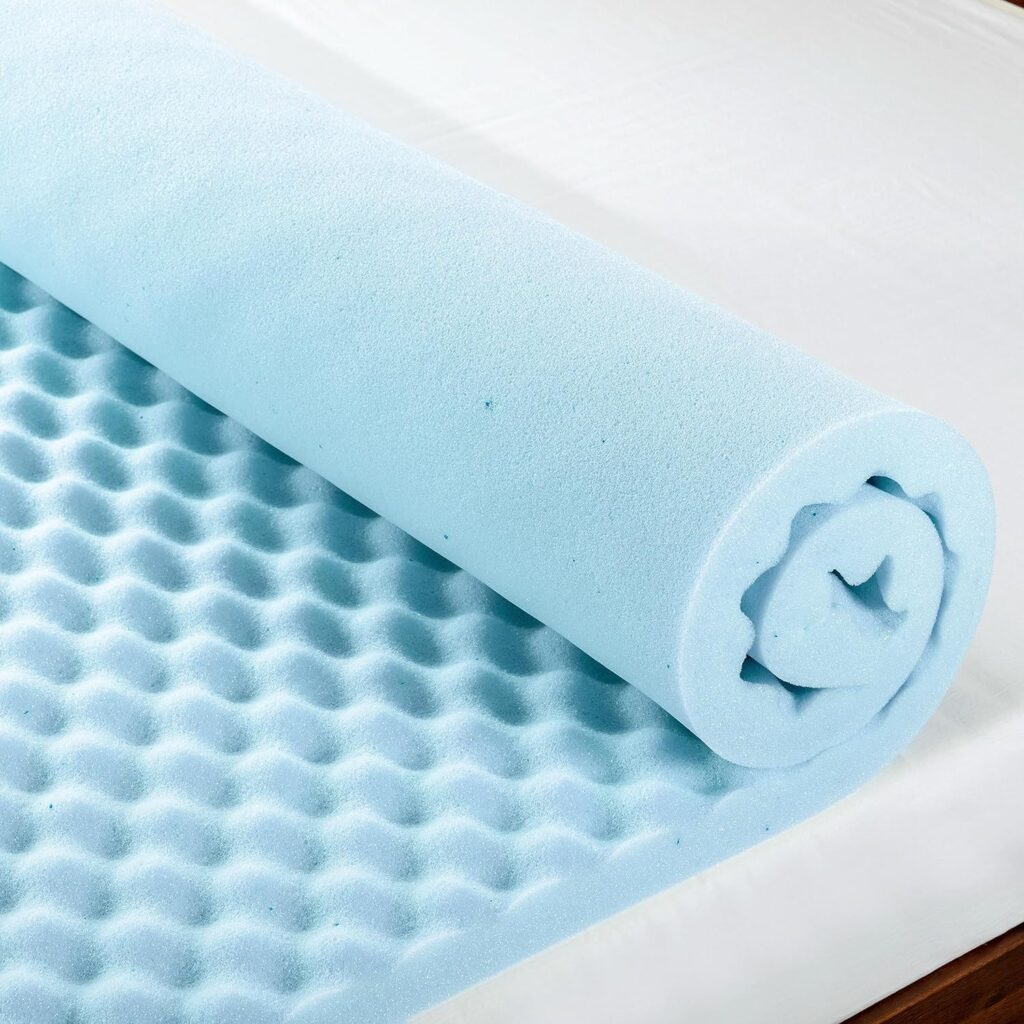
4. When we bought our camper and slept in it the first night, we realized we needed a new mattress. On day two, we went to a furniture store and got a comfortable queen-sized bed, much like you’d put in your house. No regrets there. However, the kids’ bunk beds don’t have room to put in a taller mattress to make them more comfortable. You’d hit your head on the bunk above you if the mattress was much taller. To add a bit more cushioning for the girls, without adding too much height, we bought egg crate memory foam for the bunks. One girl has her memory foam under her mattress since the mattress itself is fleecy and she likes the feel of it. The other girl added the memory foam on top of her mattress with a sheet over it. Either way, they are both satisfied with the extra cushioning.
We bought 2-inch, but it comes in different sizes if you prefer. The bunks also are not straight rectangles, they have a corner that comes in at an angle so the bunks don’t get in the way of the bathroom door. A regular mattress wouldn’t have fit with this angle, however this memory foam we were able to cut to be the perfect fit.
This is what we bought two of: Best Price Mattress 2 Inch Egg Crate Memory Foam, Cooling Gel Infusion, Full Mattress Topper, Blue (ECMF-GM2F)
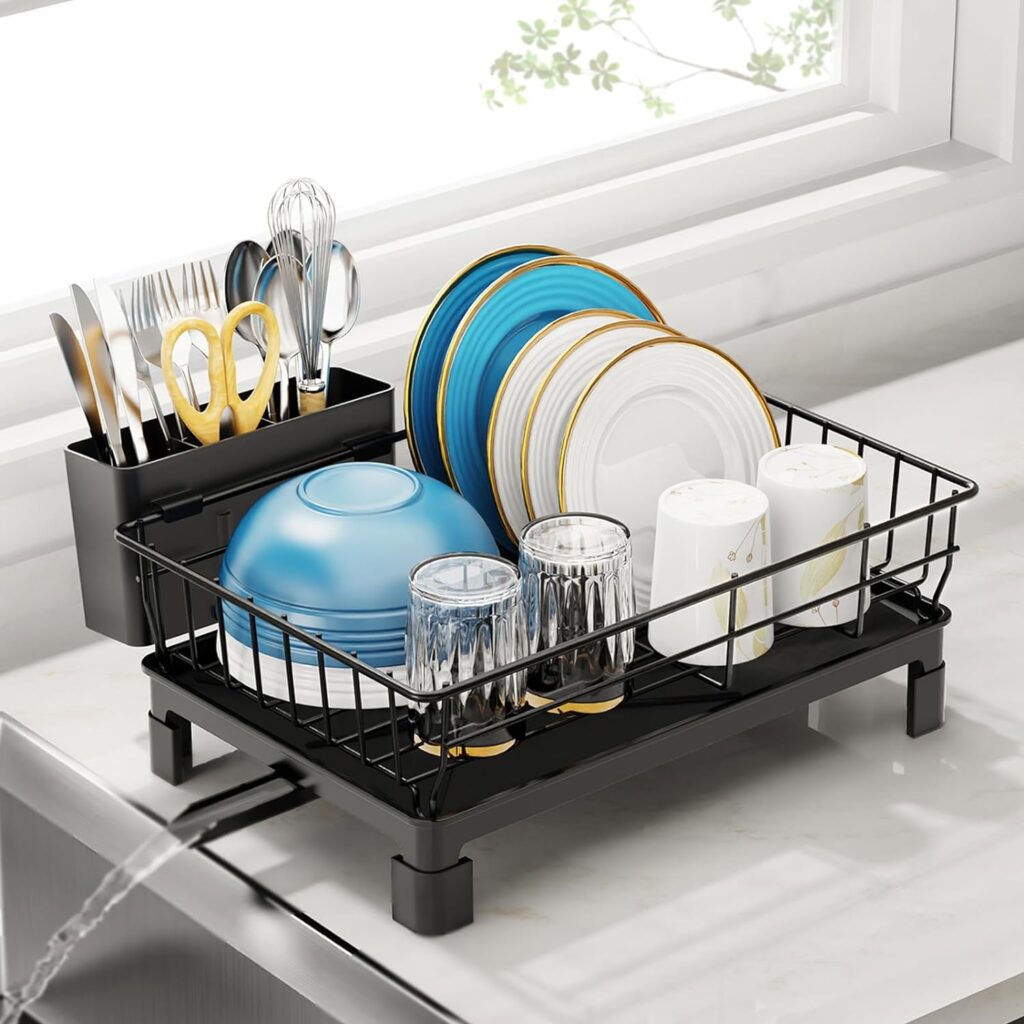
5. One of my favorite parts of the camper is the convenience of having the sink. So much easier than having to boil water like we used to when camping! We did want to make sure we didn’t have water pooling up on the counter or dripping on the floor. In an Amazon search, we came across this nifty dish strainer. The utensil rack can move to any placement and has a spout so that it drips into the main train, not out onto the counter.

The best part, though, is the spout shown below on the sink side. It drains all of the water out and back into the sink. I’ve never seen anything like it, honestly. It’s smallish, however in the camper with the four of us, it’s perfect for a meal’s dishes. We love it.
Here’s the one we purchased: GSlife Dish Drying Rack for Kitchen Counter or in Sink – Small Dish Rack for RV and Small Apartment Counter Top Space, Compact Dish Drainer with Utensil Holder and Drain Spout, Black
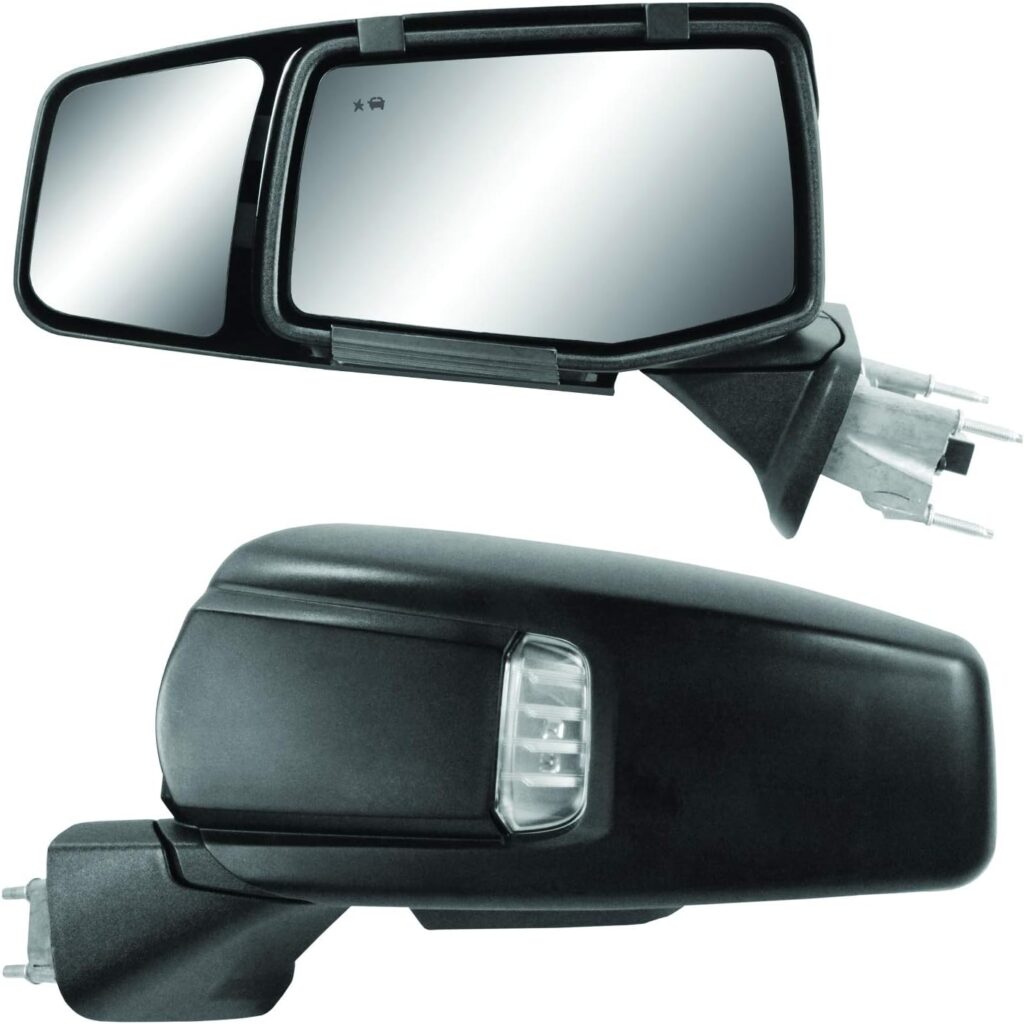
6. Our first time out with the camper we realized we needed mirror extenders. With the stock side mirrors on our 2024 GMC Sierra 1500, we had large blind spots. This made merging into traffic and backing into our campsite challenging. Watching other campers pulling their camper with midsize pickups, I noticed they had generic tow mirrors that would attach with velcro. I wanted tow mirrors that looked like they were actually the original mirrors.

We found these mirrors on Amazon for a decent price. Because it was on Amazon, I was able to put in my exact vehicle to make sure they were a match and would fit. They are a solid plastic shell that covers my existing mirror and clips on, making a snug fit that doesn’t shake going down the road. The shell blends in and looks like the original mirror. They are made to be removed when not towing, but they look like the original mirror so I leave them on all the time. They do not stick out like some tow mirrors, making them unbearable during travel, so it’s easier for us to just leave them attached to the truck.
To adjust these mirrors, it’s a simple push in either corner and they will stay in place. You will need assistance from the passenger’s seat to adjust that side as these are manually operated mirrors. We are very satisfied with these mirrors and the added visibility.
Here’s what we bought: Fit System 80930 Snap & Zap Custom Fit Towing Mirror for Chevrolet Silverado 1500/GMC Sierra 1500 (2019+), Pair
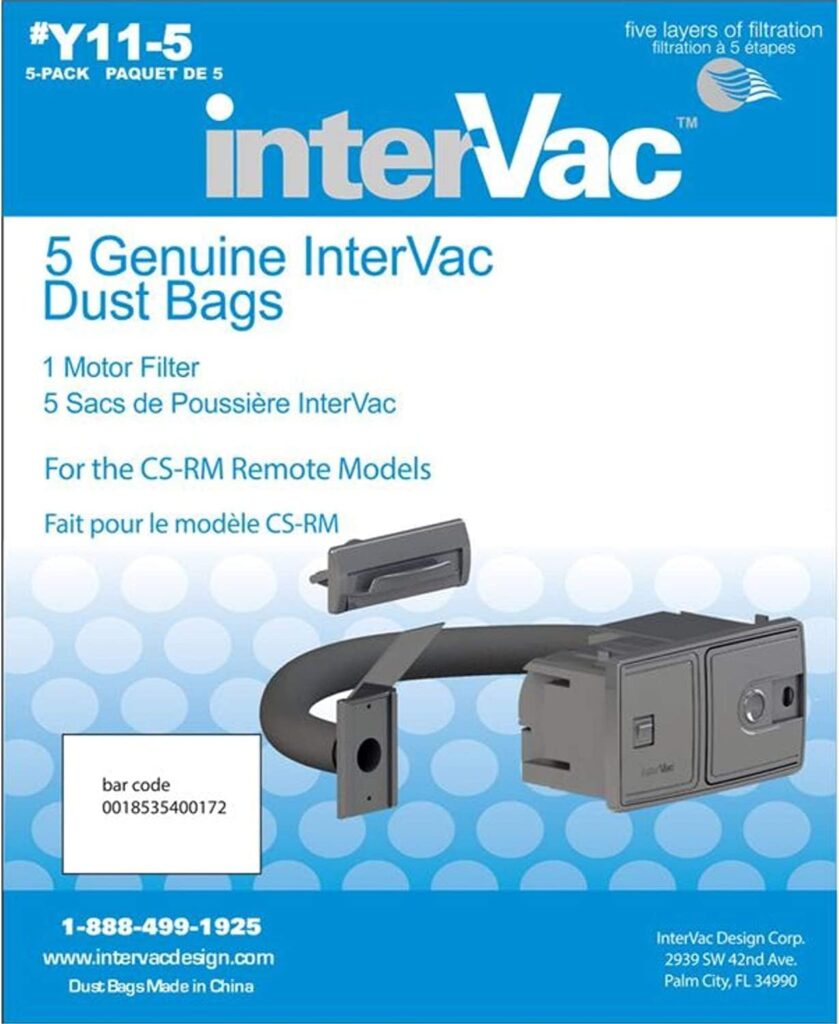
7. One of the most amazing features of our camper is the built-in central vac. It’s right under the sink on the floor. All you have to do is sweep the floors right to the vac, lift the foot flap and it sucks the dirt into it. Definitely easier than messing with a dustpan and everyone can help keep the camper clean. I love this feature and most people that have been in our camper have never seen one with this feature. To use this we need to replace the bags when they are full. I assumed we’d be doing this often, so I ordered these bags. However, it’s been almost four months since we brought the camper home and only this week did we change the first bag. But this package is lightweight and easy to store in the camper for whenever we do need to change it out. We haven’t seen these bags in store, so buying on Amazon was a necessity.
Here’s the ones we bought: InterVac Design Corp Dust Bags (Y11-5)
8. My kids are obsessed with bagels. We thought we could get away with toasting them on an open fire or setting one in a skillet to toast. Apparently, they don’t like them that way. They want their bagel to be toasted through and for sure not burnt. (When we make our own bagels from scratch, this is the seasoning we love to use. So flavorful and tastes even better than store-bought.)
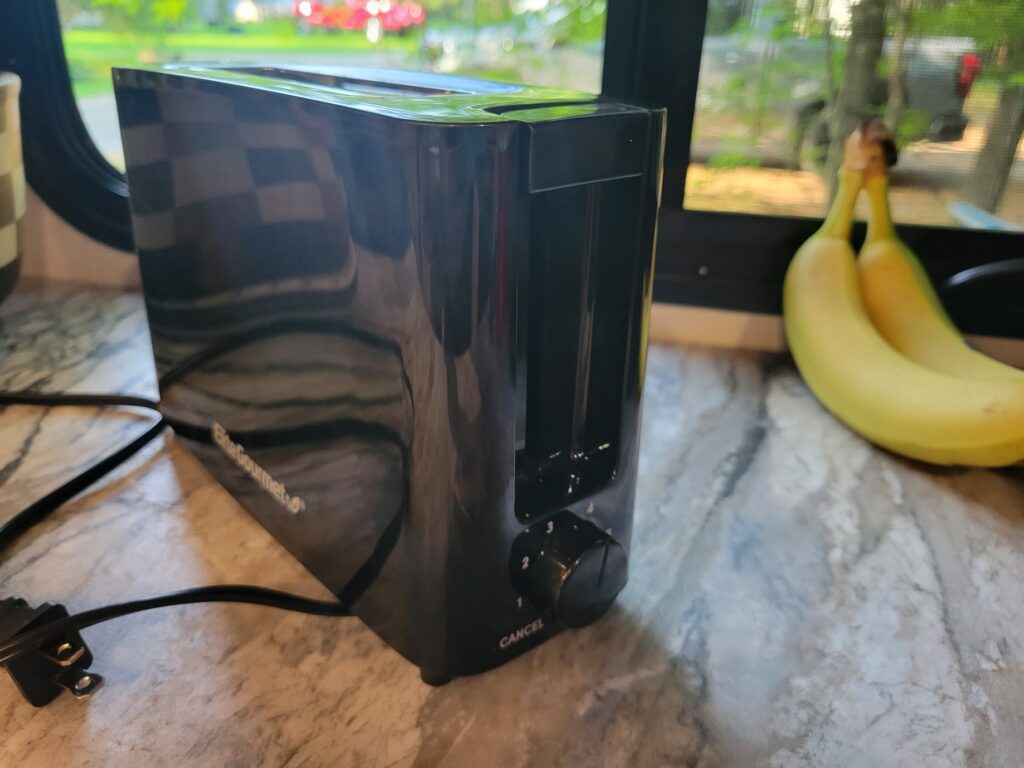
We couldn’t just bring our toaster from home because it was a four-slice toaster and would take up too much room – not on the counter, but when we had to store it on travel days. A small toaster was needed. Maybe we didn’t need to go quite this small for a one-slicer, but we were looking for a very small one and this sure is. It’s easy to store on travel days. It’s small if we leave it out on the counter when parked. It toasts our bagels. Everyone is happy.
Here is the one we purchased: Elite Gourmet ECT118B Cool Touch Single Slice Toaster, 6 Toasting Levels & Wide Slot for Bagels, Waffles, Specialty Breads, Pastry, Snacks, Black
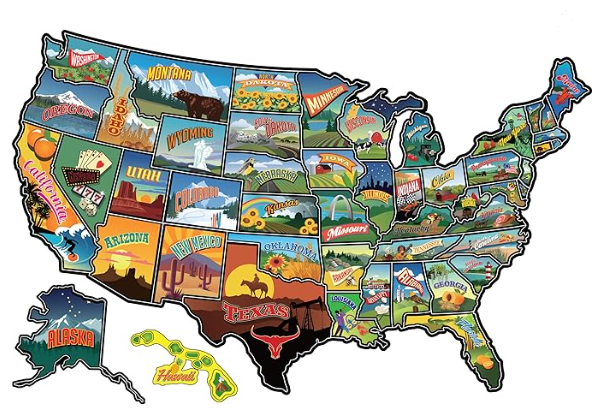
9. You’ve seen the map of the United States on the back of campers traveling down the road? Super cute, especially when the maps aren’t blank still. We didn’t want one at first because we had only been to Vermont, New Hampshire, and Maine – the rest would be blank. But as our plans to travel around the US became more solid, we ordered one. It fits perfectly on the back, and while it still only has the three states on it, soon will have more. Get one. If nothing else, it’ll inspire you to travel to fill in more states.

Here is the one we purchased: RV State Travel USA Map Vinyl Sticker – Camper Trailer Decals for Window with State Flag – Road Trip Map of America – Waterproof, UV Protection for Window, Door or Wall (Popular)
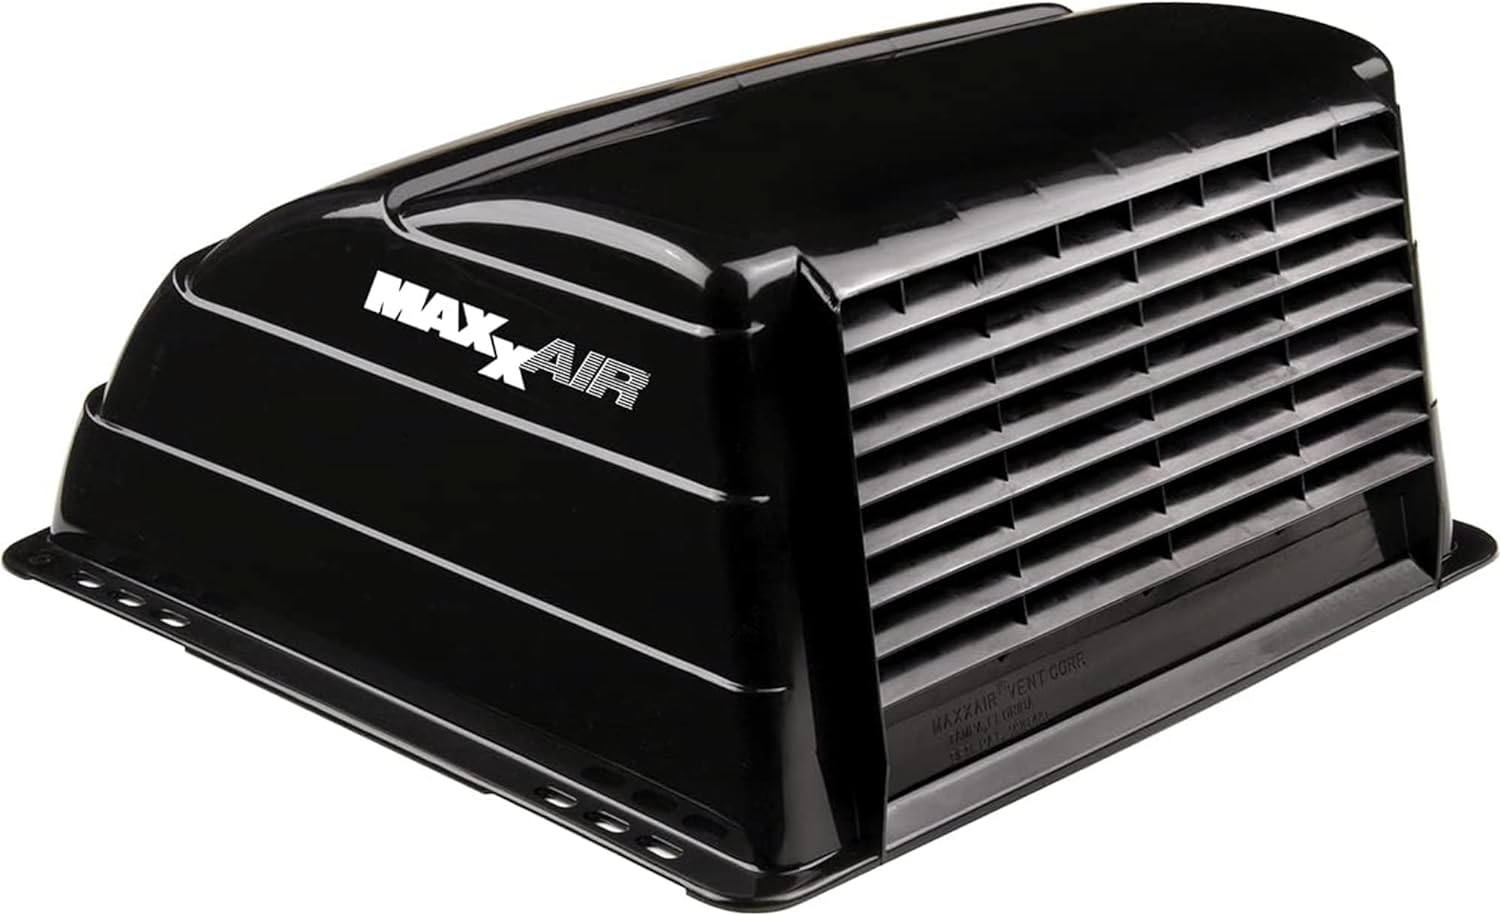
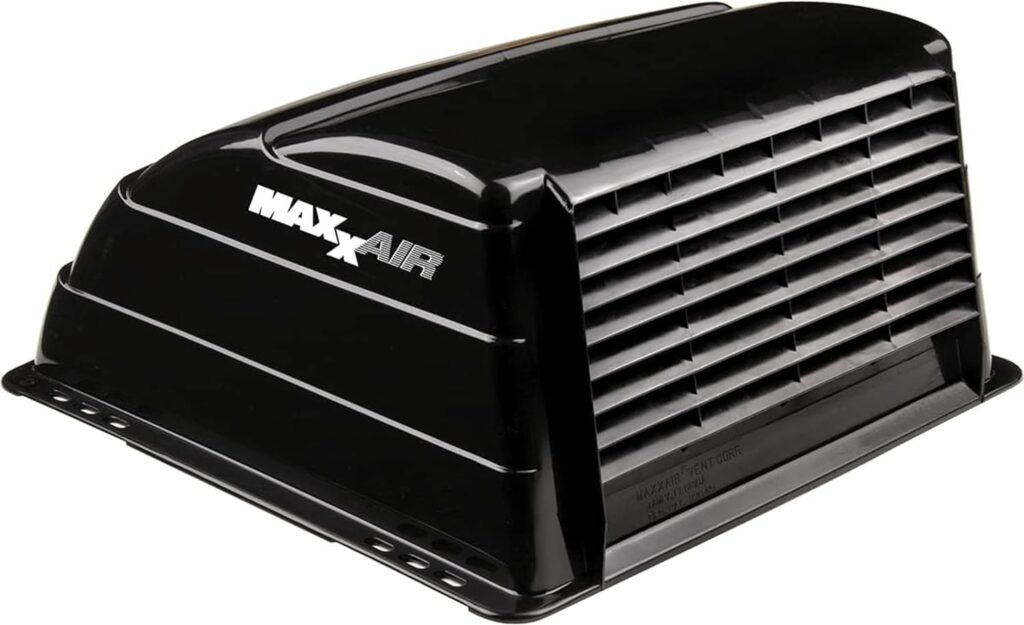
10. Our camper roof came with stock vent covers that open and close. When they were open, nothing would stop water from entering the camper. We wanted the option to leave our vents open when we went for walks or were traveling down the road. The MAXXAIR roof vents we found on Amazon offered these options. They come with all the hardware that was needed and are easily installed over the top of our vents. It was crazy to think we were about to drill holes into our brand-new camper, but the instructions were clear and easy to follow: 4 small holes were needed into the side of the vent, not the actual roof. After installing the MAXXAIR vent cover, we have left our roof vents open during travel and rain storms. They have kept all water out of our camper. While there was an option for white, we purchased the black ones to match the color of our A/C unit and antenna on our camper roof. It looks sharp and does its job!
Here’s what we bought: MAXXAIR Maxx I 00-933069 Original Vent Cover, Roof Vent Cover, Black
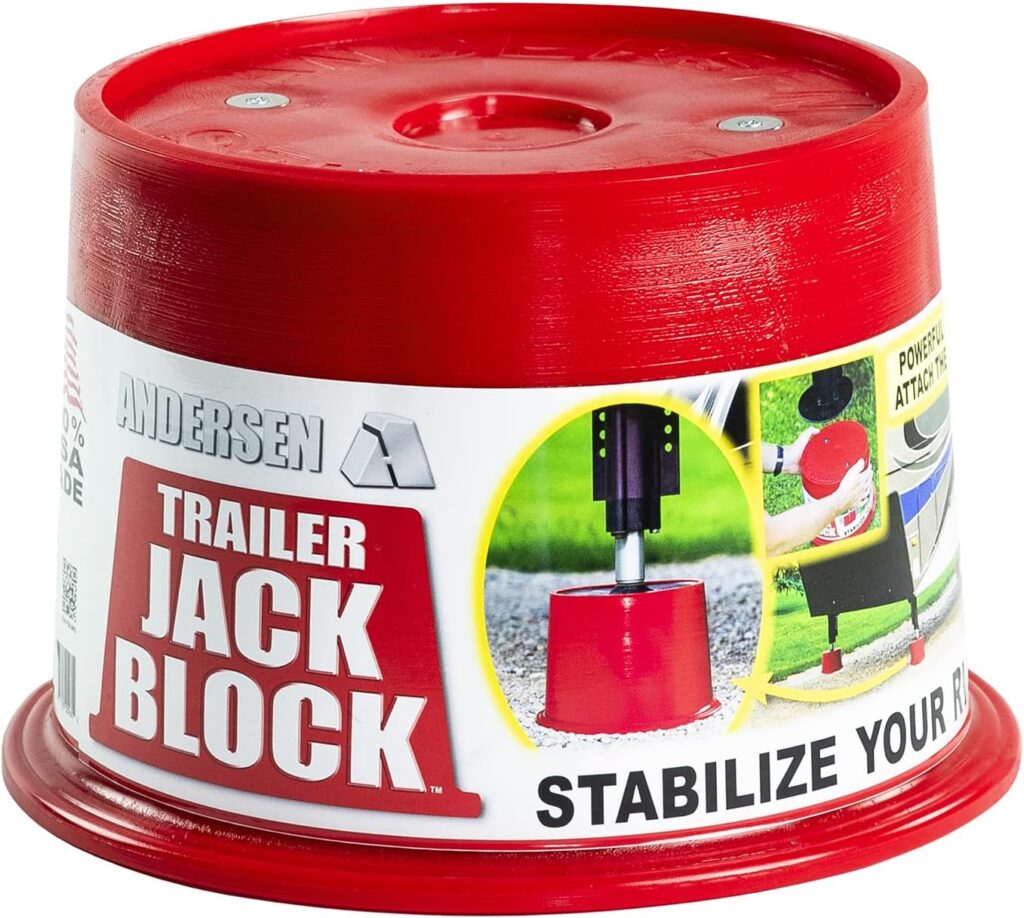
11. One of the biggest tasks to ensure an enjoyable camping trip is to have a camper that is level. Our camper is equipped with an electric tongue jack, which is way better than the old-fashioned hank crank kind. As there is a foot pad on the bottom of the jack, it has a long travel to extend all the way down to the ground.
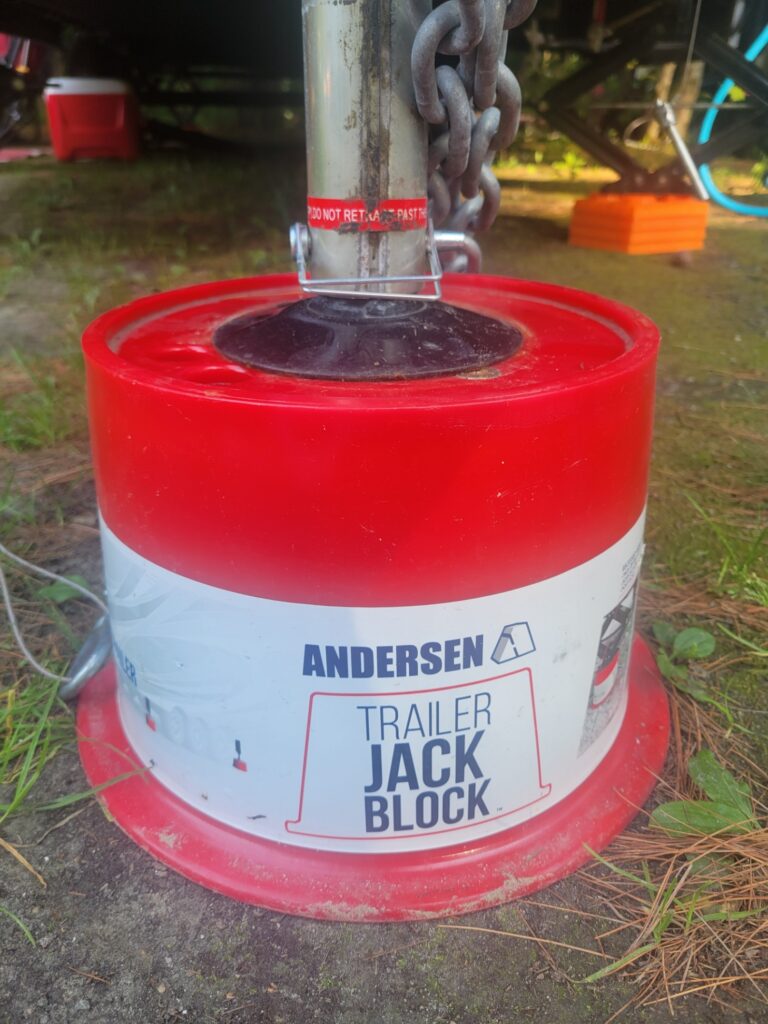
The task of connecting and disconnecting the camper from our truck was made easier with the Anderson Trailer Jack Block. This shortens the distance the jack has to extend to reach the ground. The base of the Anderson Trailer Jack Block is wide, giving a more stable platform to hold the tongue weight of the camper. Magnets on top of the jack block will make it hold itself to the foot pad on your camper’s tongue jack. This block can also be used on jack stands for 5th-wheel campers and also on the attached stabilizer jacks of travel trailers, like ours.
Here’s what we ordered: ANDERSEN HITCHES | RV Travel Accessories | 1-Pack Trailer Jack Block w/ Magnets | Quick Leveling Stabilizers for Trailers Jackstand Level Quickjack Heavy Duty Utility Blocks | 3608
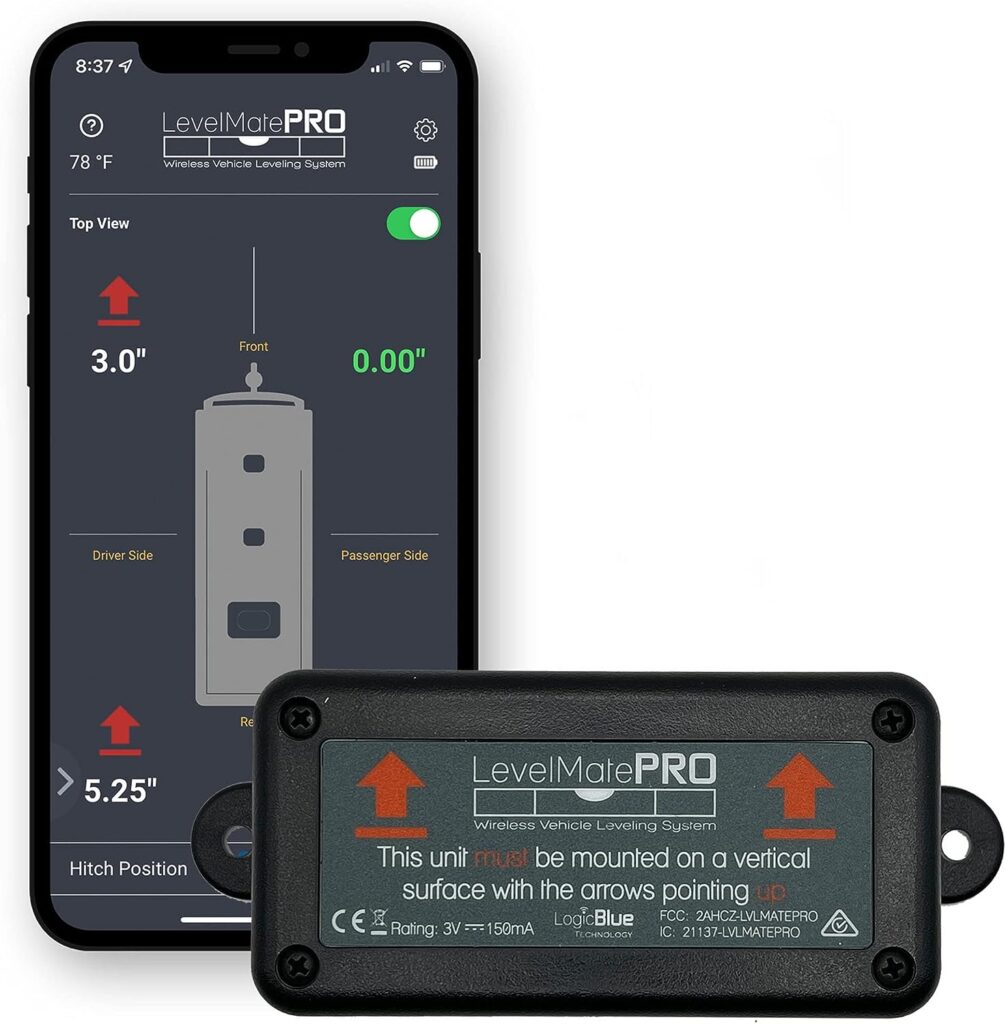
12. Leveling your camper can be the longest process when setting up your campsite. Our experience was full of making little adjustments followed by checking the levels on a 4-foot carpenter’s level. Then we had to get back into the vehicle to move the camper a few inches forward, back, left, or right. Sometimes this would make the level even worse instead of better. This is normally followed by camping couples arguing about going forward or backward and then your left or my left.
In the month we had from buying the camper to actually picking it up, we had time to research other leveling options to avoid all of that. We purchased the LogicBlue Technology LevelMate Pro Wireless RV Leveling System. A shorter name is “Game Changer.” I like backing in my camper while limiting the times I exit my vehicle. With this product, I can practically do this all from my driver’s seat by myself.
Following the setup instructions, I mounted the LevelMate Pro inside the camper behind the TV, which is about mid-camper close to the axels. With the smartphone app that syncs with the device, my phone shows me the level of the camper. I know which side I need to bring up or down with my leveling blocks. The LevelMate Pro uses quarter-of-an-inch measurement increments. A red arrow shows which side needs to go up or down and by how many inches.
As I move my camper, I watch the app from the driver’s seat until it indicates the camper is leveled by green zeros on both sides. At that point, I chock my camper wheels in place. After disconnecting my truck, I then raise or lower my camper tongue jack until the LevelMate Pro indicates the tongue is level with green zeros. No more having to make little adjustments by entering the camper to put the 4′ carpenter’s level on the floor. This helps me level it side to side as well as front to back. And no arguing with the wife!
Here’s a link to the product: LogicBlue Technology LevelMatePRO Wireless RV Leveling System, Bluetooth Leveler for Campers, Must-have Accessory for Travel Trailers, Effortless Setup for Phones with App
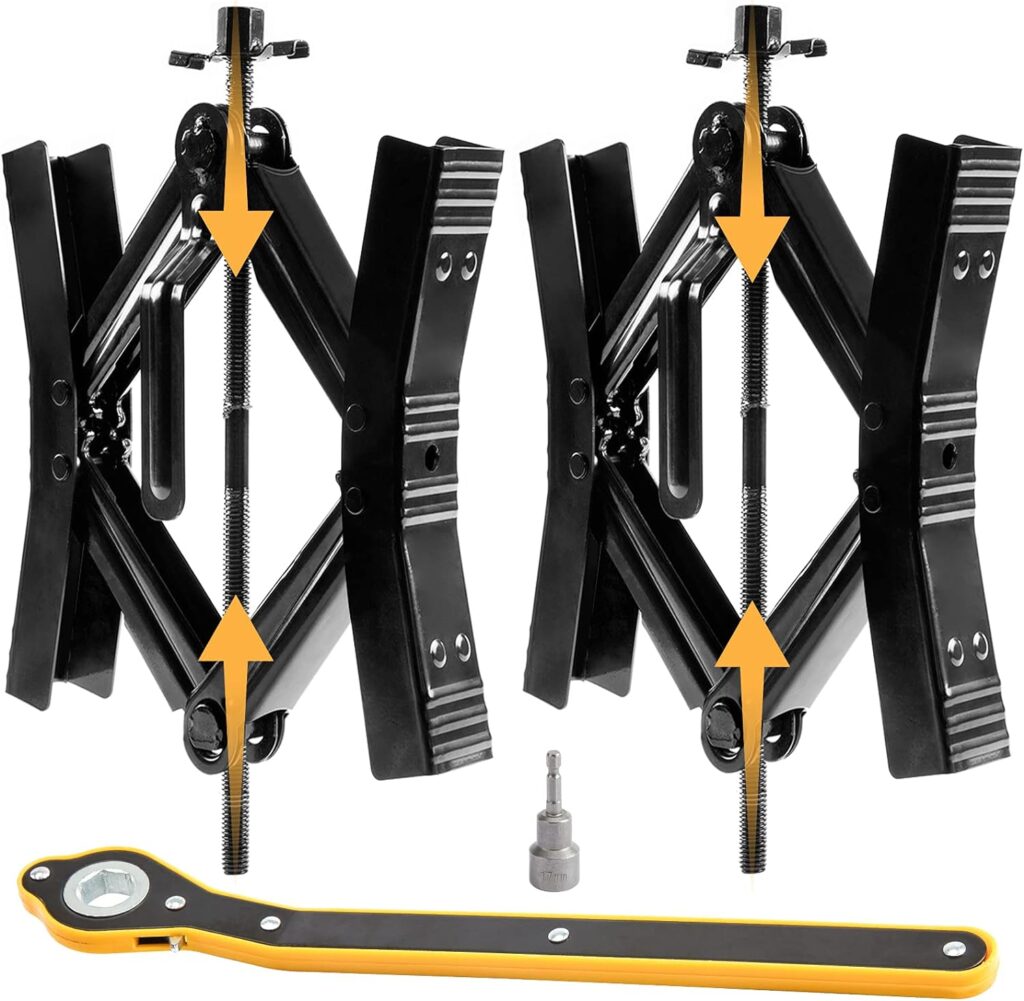
13. A family member suggested we use x chocks between the camper wheels as they will help take some of the bounce out of the camper when moving around. We researched and purchased these Scissor Locking X Chocks. After the camper is level and parked, these Scissor Locking X Chocks are placed between each set of wheels. With the supplied tool, you will turn the top nut which expands the locking chocks putting pressure against each wheel. This will lock each wheel in place, stopping the camper from rolling and assists with keeping the camper stable as occupants move around inside. These scissor wheel chocks are made for a 3.5″ to 12″ spacing between each tire.
Here’s what we ordered: Camper Wheel Chock Stabilizer 2 Sets, Double Speed Heavy Duty Truck RV Tire Scissor Locking X Chock, Camper Accessories for Travel Trailers Tire Chalks, Anti Rust Coating, Fit for 3.5” to 12”
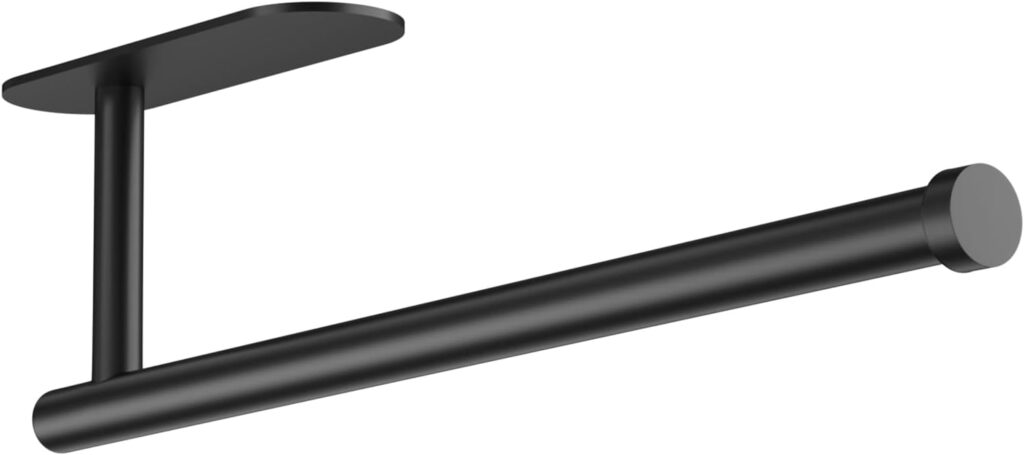
14. We didn’t want to store an upright paper towel holder every time we traveled. If you just set a roll on the counter, it always gets wet. We definitely wanted it mounted. With some double-side 3m tape, this stuck easily up under the counter and out of the way.
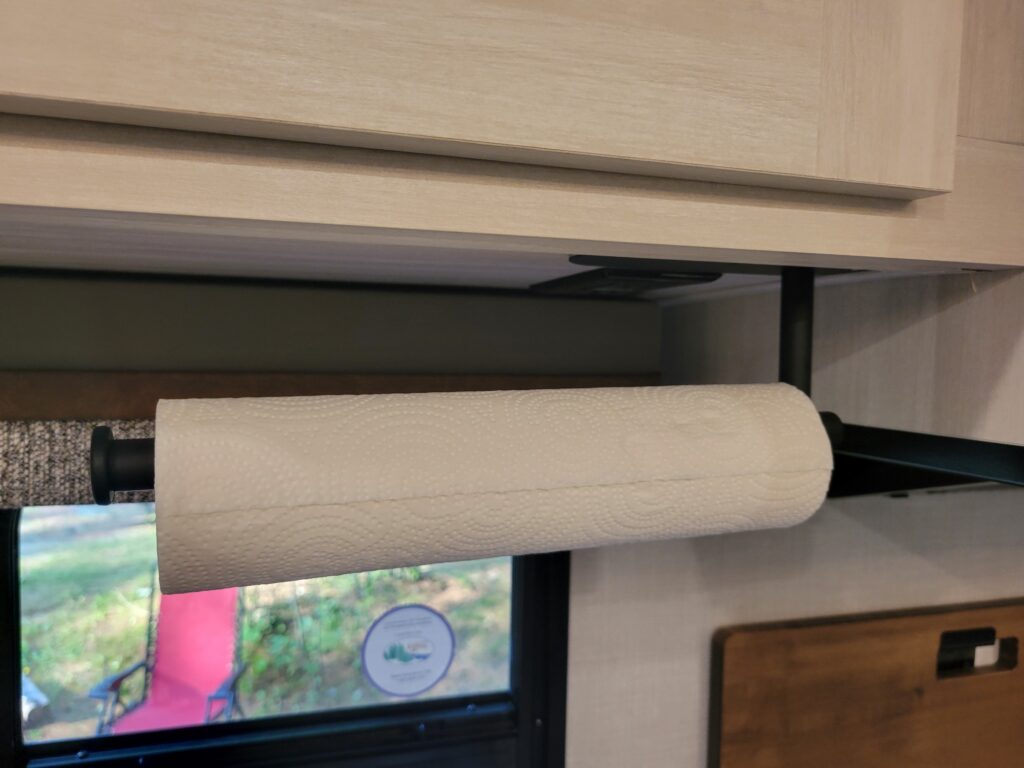
We do try to take the roll of paper towels down when we travel otherwise it all unravels onto the counter, but that’s on us to remember. This has worked perfectly for us.
Here’s what we purchased: Paper Towel Holder, Self Adhesive or Screw Mounting, Black Paper Towel Holder Wall Mount, SUS304 Stainless Steel Paper Towel Holder Under Cabinet for Kitchen, Counter, Cabinet, Bathroom Link
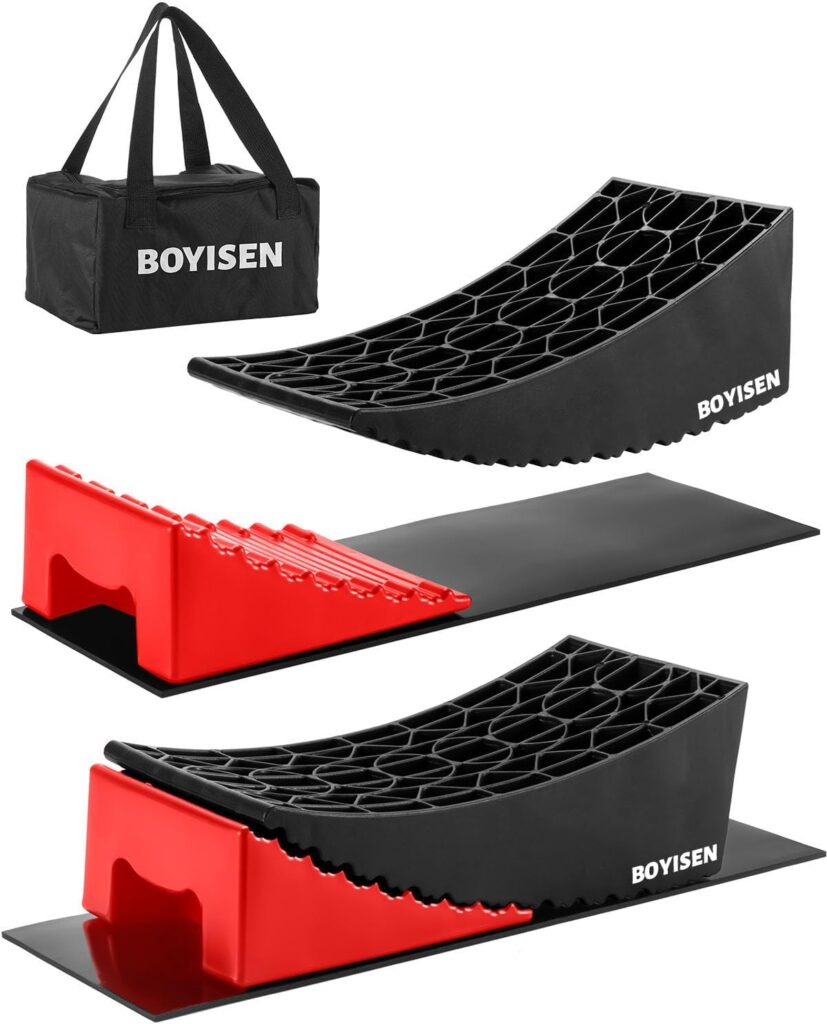
15. There are many ways to level campers. The option that looked easiest with our LevelMate Pro was the Boyisen Camper Levelers. This kit comes with 2 black levelers, 2 red chocks, 2 rubber mats, and a carry case. When we back into the campsite, we turn on the LevelMate Pro to check the level of the camper. As long as one side is not required to be raised more than 4 inches, I can place the black Boyisen Leveler behind each tire on the side that needs to be raised. Watching the LevelMate Pro App, I will slowly back the camper onto the levelers and stop when the app indicates the camper is level side to side. After putting the vehicle into park and setting the parking brake, we then slide the red chocks under the front of the tires. This levels the camper and acts as wheel chocks.
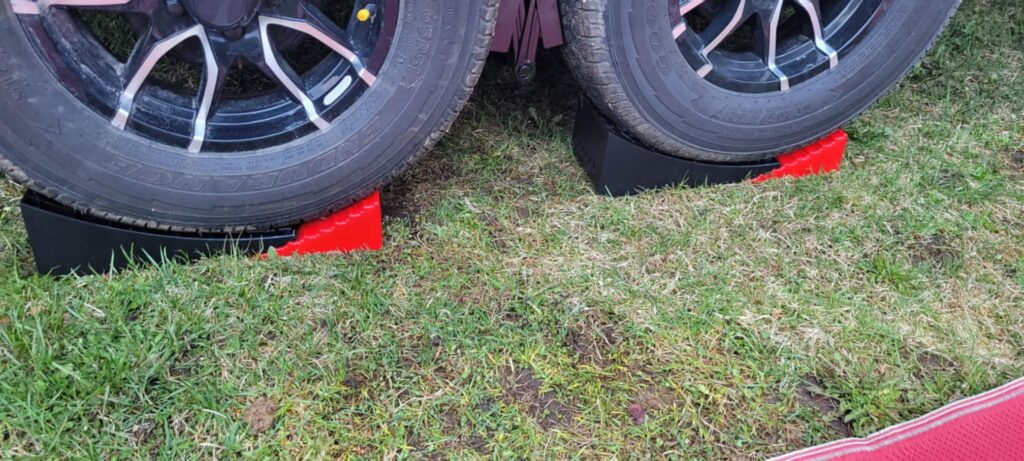
Depending on how far you need to raise the camper will determine how far up the black leveler the tire will set. Sometimes you just need a little assistance to be level and the red leveler will not be under the black leveler. From the photo above you will see one campsite that has the red chocks under the black level. The 2 rubber mats are used to go under the leveling set when the campsite is a concrete pad or another service that would cause the plastic levelers to slide, but we haven’t had to use them yet. All of these pieces easily go back into the carrying case when we leave for easy storage.
This is the set we bought: BOYISEN Camper Levelers 2 Pack – RV Leveling Blocks Ramp Kit Support Dual Axles Tandem Wheel Up to 35,000lbs RV Levelers with 2 Levelers 2 Chocks 2 Anti-Slip Mats and Carrying Bag (Black)
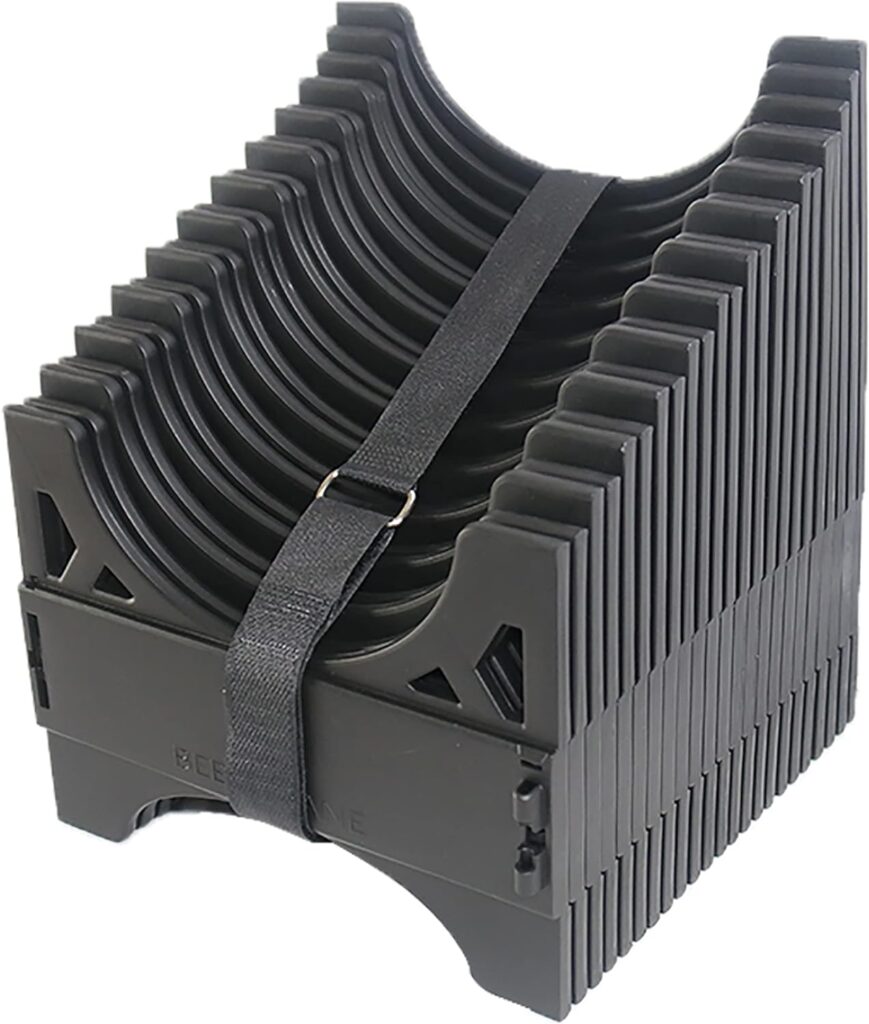
16. One of the less thrilling chores of camper use is the discharge of black water (sewer) and gray water (sink and shower). Your sewer hose, more commonly called “Stinky Slinky,” connects to your camper and plumbs black and gray water to the campsite sewer or campground dump stations. (Always make sure you use RV toilet paper. Get some here.) While in your campsite, the sewer hose will need to run along the ground from the camper to the sewer drain. As your camper discharge line is commonly about 8 to 10 inches off the ground, this will cause your sewer hose to run down toward the sewer drain. Not all campsites are the same and some sewer drains are raised up out of the ground. To ensure proper drainage, we purchased a 20-foot RV Sewer Hose Support. This support will hold your sewer hose and is angled for a gradual slope, so nothing is sitting in a low point of the hose for prolonged periods. It acts like an accordion when fully extended. When done, a black velcro strap will hold the device closed, so it’s easy to pack away and store for the next time.
Here is what we bought: 20 Foot RV Sewer Hose Support, Patented Nesting Design For Small Storage, Quick Setup and Collapse, Ensures Proper Drainage