
Pizza – no two are really the same, right? You can order it from a dozen different restaurants around you. You can buy 10+ different brands at the grocery store. You can make it 5 different ways at home. That’s what makes it so great!

When camping in our RV this year, we created the tradition of having pizza on our first night. Usually on the first night, you arrive late. You have to unpack and set up. No one wants to cook. The first few campgrounds we went to had pizza cooked onsite and then delivered to our site. Win! However, not many of the campgrounds we’ve been to since have done that. However, we’ve kept the tradition alive by either making our own, heating up frozen pizza, or ordering one out. Really, it’s just as easy to make it from scratch with this recipe as it is to order and go pick one up.

Before RVing, I had other methods of making homemade pizza. If I planned ahead enough, I made it in my bread maker. I threw all the ingredients from the recipe (which you can do with the recipe below) into the breadmaker, set it on “dough only” and in 2 to 3 hours the dough was ready. If I hadn’t planned that far ahead, then I would have used my KitchenAid mixer instead. Same idea – throw all the ingredients into the mixer, and let the mixer agitate for about 5 minutes, then simply let the dough sit for a half hour to rise. The conveniences we have available! Now, we do it by hand and really it’s so easy!
There are ways to customize the dough based on your preferences. The recipe calls for flour and we generally use white flour, however, you can easily swap it for whole wheat flour, or a half and half of both. We’ve also swapped sugar for honey for a healthier version as well. However, because there is yeast in it, you need to add the little bit of salt it calls for to make the dough rise – so don’t omit the salt.
To begin, add all of your ingredients to a mixing bowl: 1 cup of flour, salt, sugar, yeast oil, and warm water. Begin mixing it with a spoon (I don’t use a wooden spoon as it will stick too much a make a big mix – use a metal one). You want to incorporate all the ingredients so be sure you are scraping the bottom of the bowl. You want it all to be wet and mixed well, without lumps (the benefit of a high-speed mixer, but certainly doable by hand. Once it is mixed well, add the remaining flour until the dough forms a ball. I usually find 2 1/2 cups does the trick, but you will add more to your hands when you start to knead the dough.

The dough will be a nice soft ball when you have enough flour, and won’t be too sticky. Now is when your hands get dirty! With clean hands, of course, you need to begin to knead the dough. If you have room, put a piece of parchment paper on the counter, adding some flour to it, and begin to knead your dough on it. When we made pizza last night, we instead left the dough in the bowl and kneaded it in there. Basically – just play with the dough. Fold it in half. Bend it. Flip it. Turn it. Repeat. Repeat. Repeat – for about 3 to 5 minutes. This is what will make the dough rise. Don’t skip this step. (If you aren’t at camp and are using your breadmaker or mixer, this will be done for you). But there really is something to be said for kneading your own dough. Be proud of it!
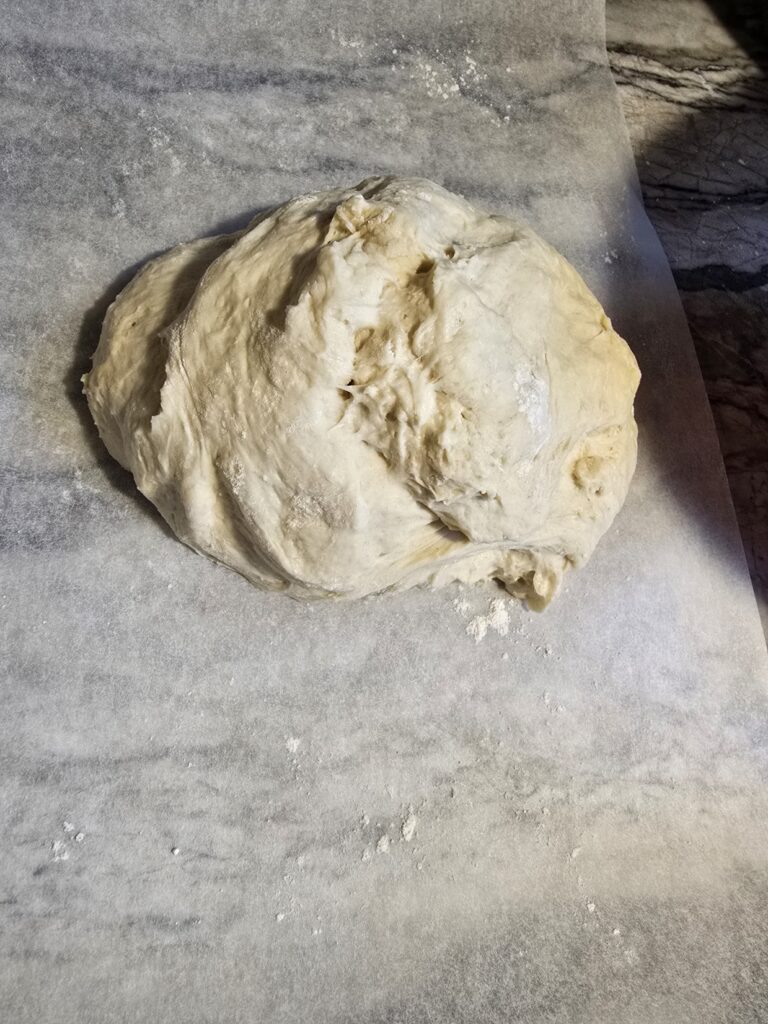
Once you are done playing in the dough, it’s time to let it rise. Add it back to the bowl you mixed it in, cover with plastic wrap and put in a warm area. I set it on our dinette table in the sun, then went and played a game of mini golf, because – why not? When I came back from losing, the dough had risen perfectly and was now ready to cook. You need to let it sit for at least a half hour, but it was probably an hour and a half before we got back. It was perfect.
If you are in a camper, you have two real options for cooking your pizza now (without buying a pizza oven). Bake it in your oven or cook it on your camp griddle. We were used to cooking on our blackstone at home, so if it’s not raining, we cook outside on the griddle. If you are going to bake it instead, just spray your baking pan, push out your dough on it to fill the size of the pan, then cook the dough at 400 for about 8 minutes, then add toppings and cook another 8 minutes or so until cheese is melted.
If you are cooking on the griddle, a grill dome is ideal. Get yours here. They make round ones, but ours is rectangular. Just be sure you buy one that fits the size of your griddle. Because you will be using this to melt your cheese on top and work like an oven, you will need to make sure when you roll out your dough, that it will fit under this cover. Bring it inside and put it over the dough as your roll it out, make sure it fits and you won’t be leaving some of the crust hanging out.

Do you like your crust on the thicker side or more of a thin crust? You can make thick crust by leaving this dough all as one pizza, or you can split it up into two crusts to make it thinner. You will just need to cook one first, then repeat for the second one. In the video below, we show you how it looks leaving it all as one pizza. It was delicious and not too thick.
Once your dough is the right size and you are content with it, preheat the griddle on low, and spray with cooking spray. We really like it when we put breadcrumbs or panko in with the crust. We either add it to the parchment paper when we roll out the crust, or we add it to the grill and put the dough on it so it cooks into the dough. That is what we did this time.
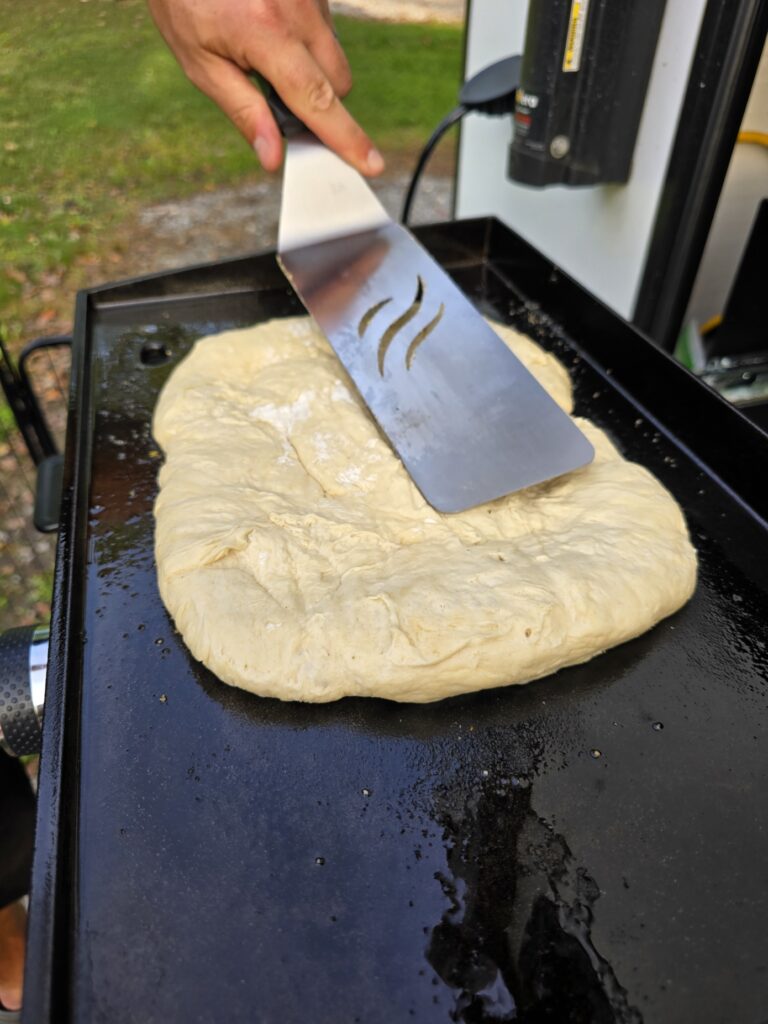
Push down on the dough with your spatula just to make sure it’s flat, and so the breadcrumbs get pushed into the dough. If the dough expanded on any direction in the transfer to the grill, push it in with the the spatula as well, so it retains its shape.

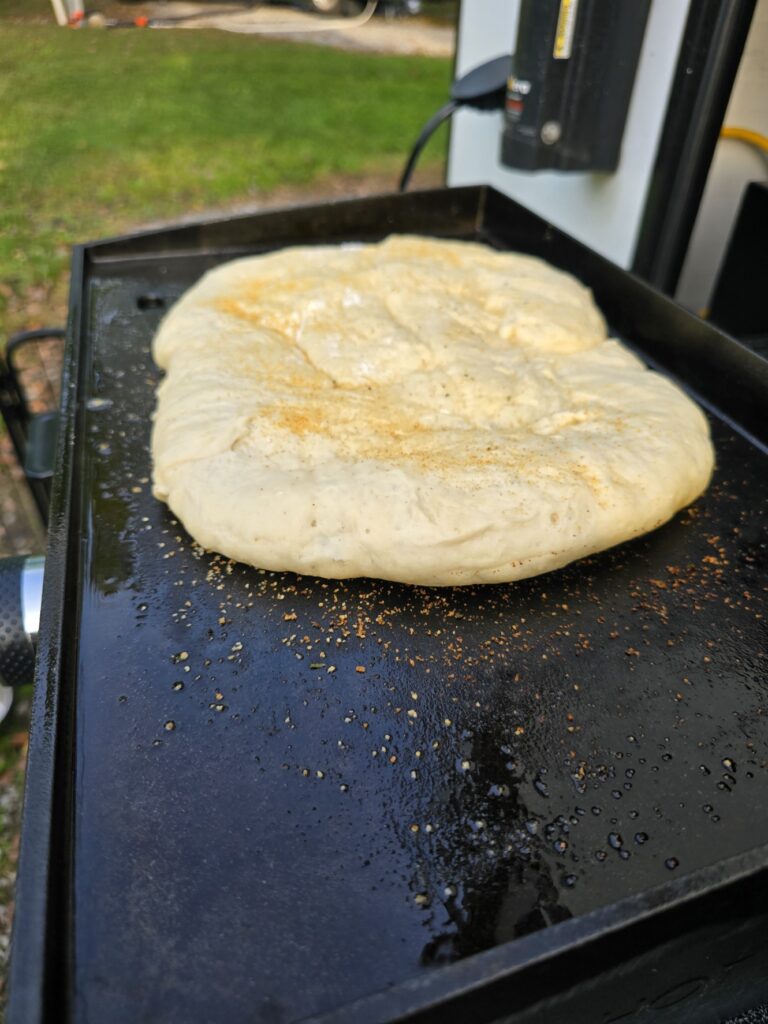
The crust should stay on this side for only a few minutes, or until the underside starts to brown. As it cooks, the dough will be less flimsy, so you should easily be able to look under it with your spatula. Once it is golden blown, flip the dough over to begin cooking the other side. Now is when you begin to add your toppings.
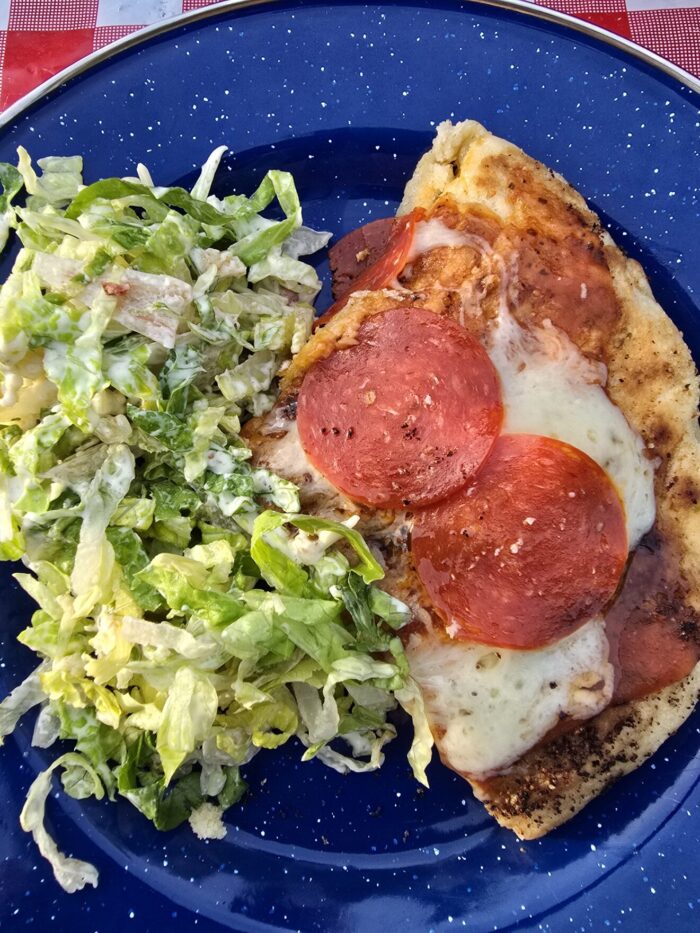
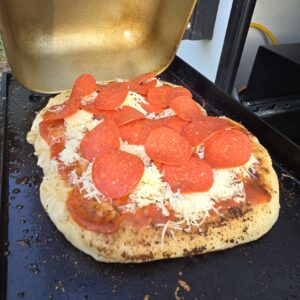
We spoon sauce on first. How much you use it totally a preference to you. We spread a nice thin later on, covering the crust up to about an inch of the crust. We then sprinkle some seasonings on the sauce. We like adding garlic powder and Italian seasoning. Sometimes we get crazy and add some flavored Grill Mates seasonings, but depends on who is cooking and what we feel like. Last night, we just made a pepperoni pizza, so had no veggies, but if you are adding veggies you may want to cook them ahead of time. Your pizza won’t be on the grill for long, so things like onions and peppers won’t really have time to cook. If you want them cooked, toss them on the grill before adding the crust – plus it’ll smell great cooking those outside. Neighbors will want to know what you’re having.
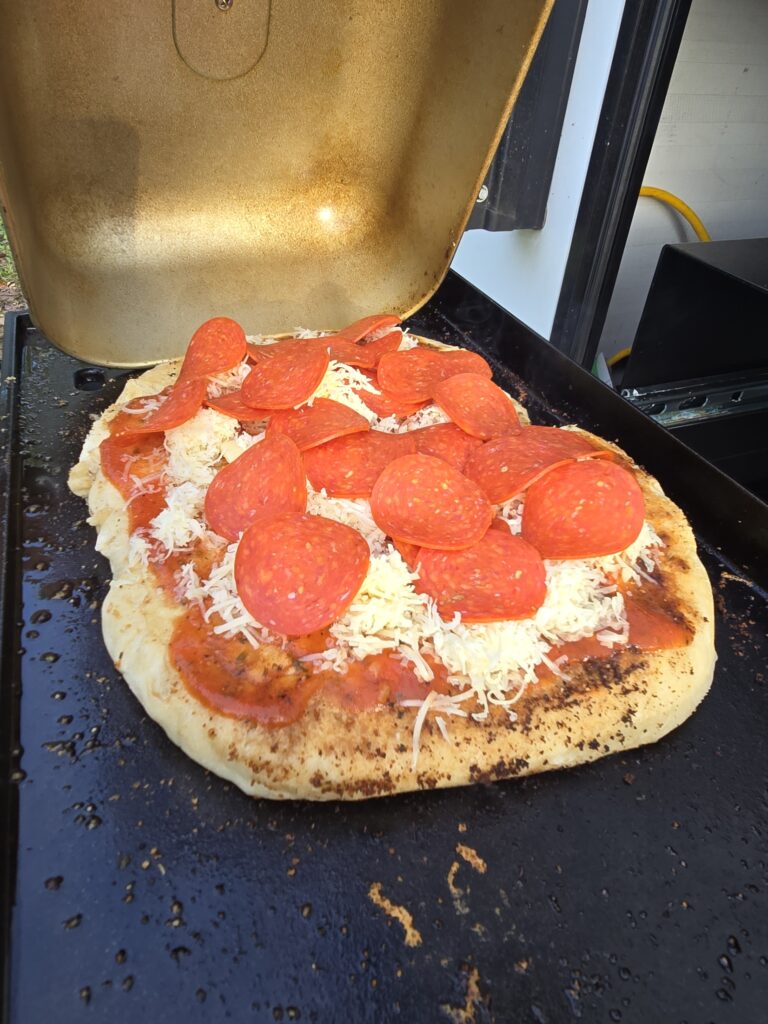
Once you have your desired toppings on, it’s time to cover the pizza. You do this so that it acts like an oven, holds the heat in, and melts the cheese. If you made your crust right and measured your grill dome, this will fit perfectly. If you don’t have a cover, try adding aluminum foil over the pizza and create a dome – just something to hold the heat in.
Check under the cover every few minutes to see if the cheese is melted yet. It should only take about 5 minutes total. When it’s done, use your pizza slicer and cut into how many slices you desire. And voila – you have yourself homemade pizza at camp. Enjoy!
Easy to make Pizza (from scratch!)
Ingredients
- 2 1/2-3 cups flour
- 1 tbsp. sugar
- 1 tsp. salt
- 1 pkg. active dry yeast or 2 1/4 tsps.
- 3 tbsp. olive oil
- 1 cup very warm water
Pizza Toppings
- Tomato Sauce desired amt.
- Shredded Cheese desired amt.
- Other Pizza Toppings Pepperoni, Peppers, Mushrooms, Olives, Etc.
Instructions
- In a bowl, add 1 cup of the flour, sugar, salt, yeast and oil. Add in the warm water and mix with a metal spoon. Continue to mix for at least one minute, making sure to incorporate all of the flour.
- Stir in enough of the remaining flour until dough is soft and forms a ball – usually right about 2.5 cups total.
- Flour your hands, then begin kneading the dough on a floured surface, or right in the bowl, for 2 to 3 minutes. (Basically just play with the dough!)
- Cover the bowl with plastic wrap loosely and place the bowl in a warm area to rise. Leave for at least 30 minutes for the dough to rise. Dough should be about double in size.
- When dough has risen, decide if you want to make one pizza with a thickish crust, or split into two for two thinner crusts.
- On a piece of floured parchment paper, push dough out into the desired shape. Because the cheese needs to melt, having a grill dome to cover the pizza while it is cooking is ideal. We push the dough out to the size of our dome that way we know it's going to fit in the cooking process.
- Preheat your camper griddle on low, spraying with cooking spray.
- Sprinkle the gridle with flavored bread crumbs if desired (a favorite of ours) and add the dough to the griddle.
- Cook for 3 to 4 minutes on that side. You can flip it over once the bottom side is browned. It should be easy to flip now since one side is cooked.
- Spoon on the desired amount of tomato sauce and sprinkle that with any seasonings you want to use (garlic powder, basil, italian seasoning, etc.).
- Sprinkle with shredded cheese and top with any toppings you want.
- Add your grill dome over the pizza. This is done to melt the cheese and cook the toppings. (If you are using peppers, onions or other veggies, you may want to precook them on the grill). This step is really just to melt the cheese.
- Open the cover to check for doneness. When cooked, cut with a pizza slicer to desired number of slices and serve!
Are you following us on all the socials? Click each of the links below to follow:
Facebook – https://www.facebook.com/profile.php?id=61561917326237
Instagram – https://www.instagram.com/loveatfirstsiteblog/
Youtube – https://www.youtube.com/@LoveAtFirstSiteBlog
Pinterest – https://www.pinterest.com/theloveatfirstsiteblog/